How to Manage DNC Compliance with Landline Remover
Ensuring DNC (Do Not Call) compliance is a critical task for businesses engaging in telemarketing or SMS marketing. One of the tools that can streamline this process is Landline Remover, which helps businesses scrub their calling lists to avoid contacting landline numbers that should not receive marketing calls. Here’s how Landline Remover supports DNC compliance:
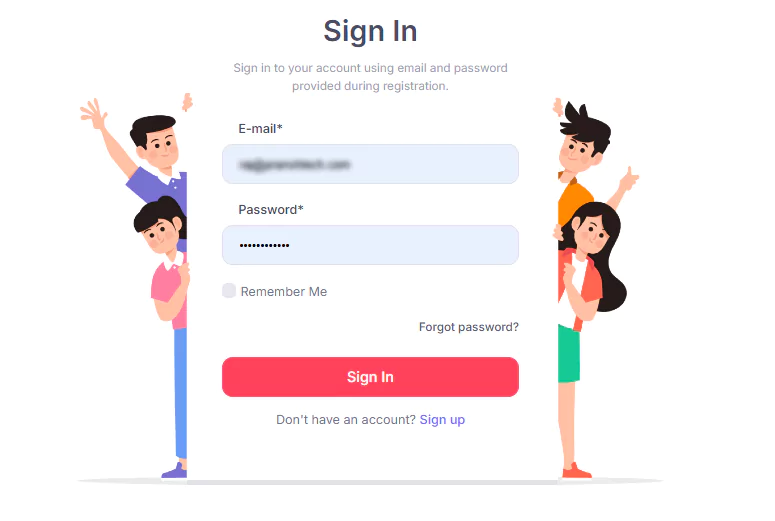
Step 1:Log In to Landline Remover
Visit the Landline Remover login page at https://app.landlineremover.com/signup/. Log in with your registered username and password. If you don’t have an account, you will need to sign up first.
After logging in, you will be redirected to the main dashboard where you can view all the relevant information about your account, including payment method, Invoices etc.

Step 2:Upload Your Contact List for DNC Checking
On the main dashboard, locate and click on the “Bulk Upload” option. This will allow you to upload your contact list for DNC (Do Not Call) checking.
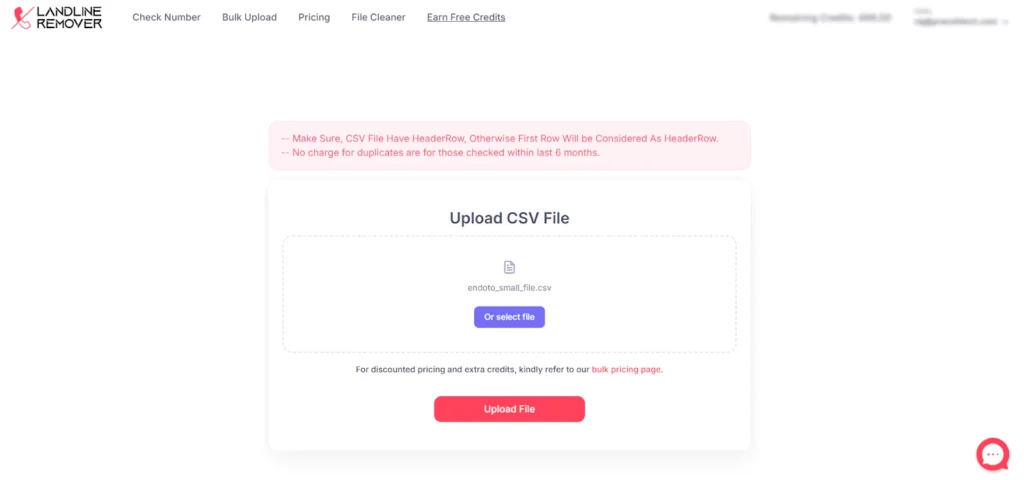
Click on the “Select File” button to browse your computer and choose the contact list file you want to upload. Ensure that the file format is compatible with Landline Remover (e.g., CSV, Excel).
Step3. Upload and Select the Phone Number Column
After selecting your contact file, click on the “Upload File” button to proceed with the upload.
On the next screen, you will be prompted to select the Phone Number column from your uploaded sheet. Make sure the phone number column is included in the file you are uploading.
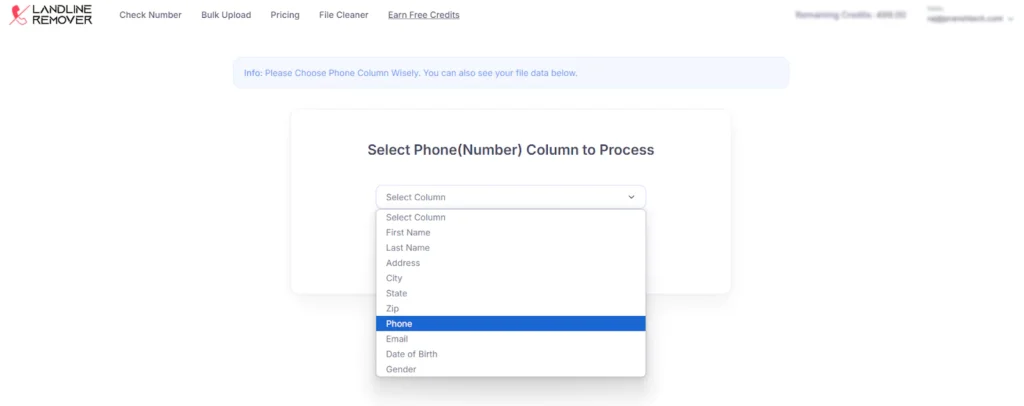
Once you’ve selected the appropriate phone number column, click on the “Process” button to begin filtering the numbers against the DNC registry.
Step 4. Verify and Process the File
After uploading your file, you’ll see a summary screen that provides all relevant information about the uploaded file, including:
- Total Records: The number of contacts in your uploaded file.
- Selected Phone Number Column: The phone number column you selected for processing.
- Total Credits Used: The number of credits consumed based on the number of phone numbers in the file.
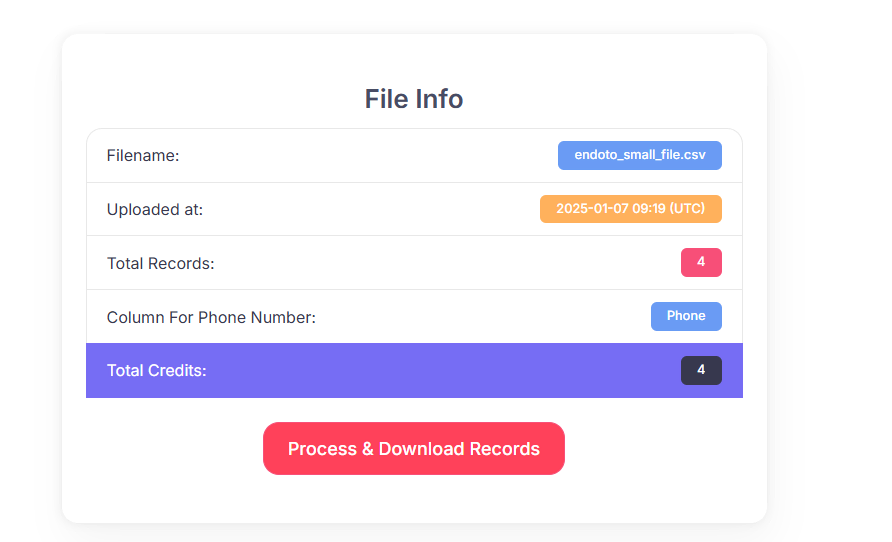
Once you’ve verified that all the details are correct, click on the “Process & Download Records” button to complete the process and download the filtered records.
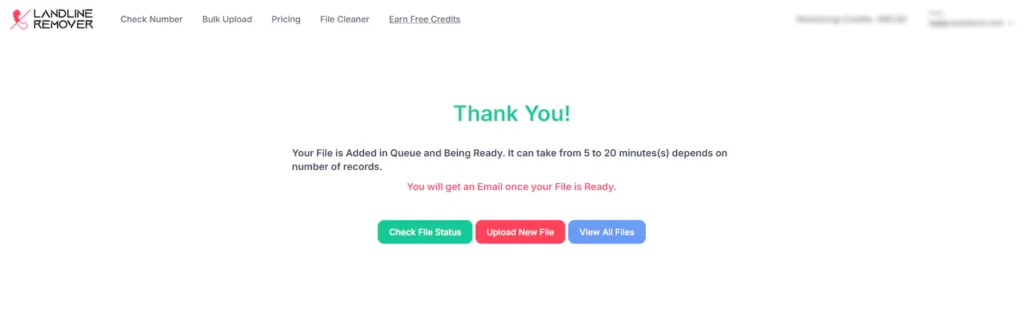
Step 5. Review Processed File and Download
Once the processing is complete, a screen will appear confirming that your file is ready, along with the status of the process. You can check the file status at this point.
Click on the “View All Files” button to see a list of all processed files. This will take you to a screen where you can locate your file.
In the dropdown menu under “DNC Type”, you will find three options:
- Clean: This option shows the contact list without any DNC or litigator numbers.
- DNC: This shows the full details of numbers that are under the DNC registry.
- Litigator: This shows numbers associated with known litigators.
Based on your preference, select the appropriate filter (Clean, DNC, or Litigator) to refine your contact list.
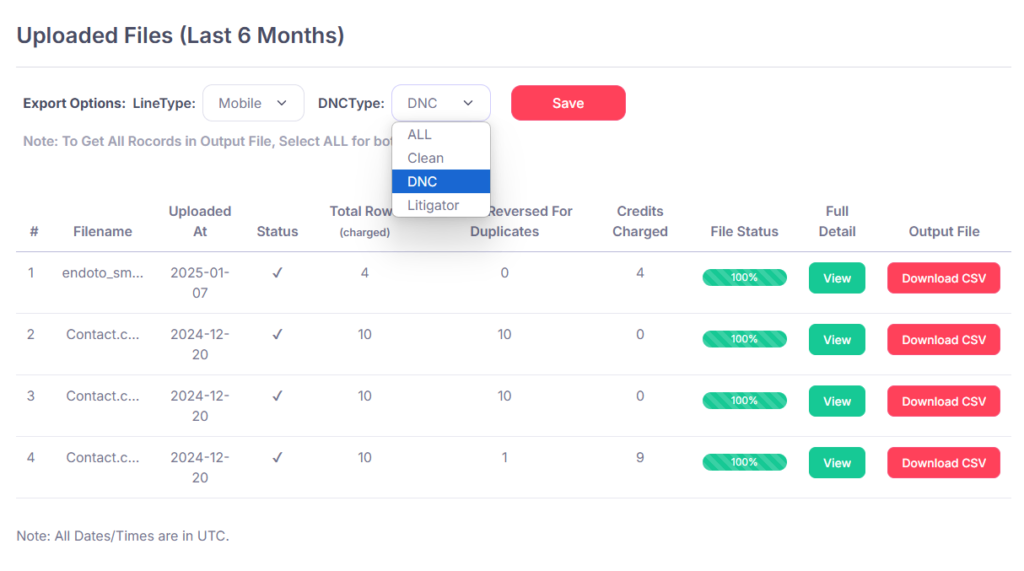
After filtering, click on the “Download CSV” button to download your processed contact list.
Congratulations!: Your contact list is now ready for your SMS Marketing Campaign or Telemarketing Calls. You are now compliant with DNC regulations and can proceed with your campaign.